

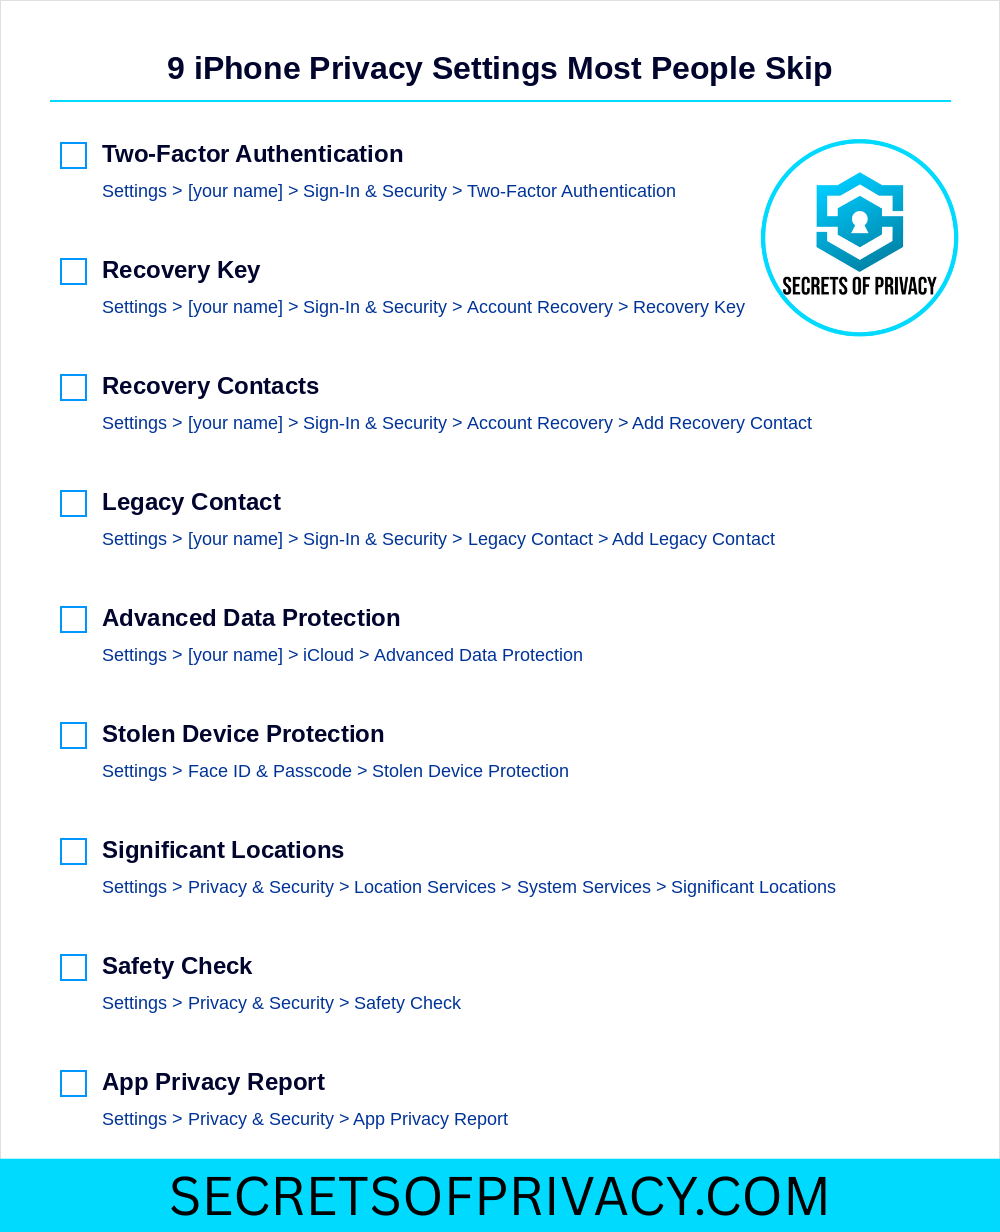
9 iPhone Privacy Settings Most People Skip
The settings Apple doesn't make obvious, and why they matter

Your iPhone has a lot of privacy and security settings that you probably wish you knew about. Most of them are buried in menus you’ve probably never opened, and Apple doesn’t go out of its way to surface them.
That’s a problem, because some of these settings genuinely matter. They determine what happens to your account if you die, whether a thief can lock you out of your own Apple ID, and how much of your data Apple itself can access.
This post covers nine settings worth your attention. Some are foundational. Others are more situational. All of them are overlooked by the vast majority of iPhone users.
You don’t need to enable all nine today. But you should at least know they exist.
Note for paid subscribers - we added two extra privacy/security features just for you at the end. 🎁
Two-Factor Authentication
Two-factor authentication is the baseline. If you haven’t enabled it, nothing else on this list matters much.
Here’s how it works: when you sign into your Apple ID on a new device, Apple sends a six-digit verification code to a device you already trust. Without that code, your password alone isn’t enough to get in.
This protects you from the most common attack vector: someone who’s obtained your password through a phishing attempt, a data breach, or simple guessing. Even if they have the password, they’re stuck without physical access to one of your trusted devices.
If you created your Apple ID in the last few years, two-factor authentication may already be enabled. But it’s worth checking.
To verify or enable: Settings > [your name] > Sign-In & Security > Two-Factor Authentication.
If it’s off, turn it on. If it’s on, make sure your trusted phone numbers are current. That list is critical because if you lose access to all your trusted devices and your trusted phone numbers are outdated, recovery becomes significantly harder.
Recovery Key
A recovery key is a 28-character code that serves as a backup way into your Apple ID if you ever get locked out.
Once you enable a recovery key, Apple can no longer help you regain access to your account. The usual “forgot password” flow that relies on Apple verifying your identity? Gone. You’re on your own.
That might sound scary, but for privacy-conscious users, it’s actually a feature. It means Apple doesn’t have a back door into your account. No one at Apple can reset your password, which means no one can be socially engineered or legally compelled to do so either.
So the catch here is kind of obvious. If you lose your recovery key and get locked out, you’re done. There’s no appeal process. There’s no customer service escalation that will save you. Your account and everything in it (photos, documents, purchases, etc.) becomes permanently inaccessible.
To enable: Settings > [your name] > Sign-In & Security > Account Recovery > Recovery Key.
If you enable this protection, be sure to write the code down. Store it somewhere physically secure and separate from your devices. A safe deposit box or at home firebox are great locations. Treat it like you’d treat a passport or a birth certificate.
Recovery Contacts
Recovery contacts offer a softer alternative to the recovery key.
Instead of relying entirely on a code you might lose, you designate one or more people you trust. If you ever get locked out, Apple can send them a verification code that helps confirm your identity. They don’t get access to your account, rather, they’re just vouching for you.
This is a good option for people who want a safety net but aren’t ready to go full self-sovereign with a recovery key. It’s also a reasonable complement to a recovery key, giving you multiple paths back into your account if something goes wrong.
To add a recovery contact: Settings > [your name] > Sign-In & Security > Recovery Contacts
Choose someone who’s reliable, who won’t lose their own phone, and who you’ll still be in contact with years from now. You can add multiple people if you want redundancy.
One thing to keep in mind: recovery contacts won’t help you if you’ve enabled a recovery key and lost it. The recovery key overrides everything. So think of these as two different approaches rather than layers that stack on top of each other.
Legacy Contact
Here’s a question most people don’t think about: what happens to your Apple ID when you die?
By default, the answer is “nothing good.” Your family can’t access your account. They can’t retrieve your photos, your documents, your messages. Apple’s policy is to protect your privacy, even posthumously, which means your data stays locked unless someone navigates a complicated legal process involving death certificates and court orders.
A legacy contact changes that.
You designate someone, such as a spouse, a family member, or a trusted friend, and share an access key with them. When you die, they combine that key with a copy of your death certificate to gain access to your account. They can download your data, manage your digital legacy, and eventually memorialize or delete the account.
To set up a legacy contact: Settings > [your name] > Sign-In & Security > Legacy Contact > Add Legacy Contact.
You’ll be prompted to share an access key with the person you choose. You can send it digitally or print a physical copy. Either way, make sure they know where to find it and what it’s for.
This setting is especially important if you have photos or documents that would matter to your family. Without a legacy contact, those memories might be lost forever.
Advanced Data Protection for iCloud
This is the most significant privacy setting Apple has introduced in years, and few people use it. Here’s a quick overview.
When you store data in iCloud, Apple encrypts it. But for most data types, Apple holds the encryption keys. That means Apple can technically access your data if they choose to or if they’re compelled to by law enforcement. Your iCloud backups, your photos, and your notes can be ready by Apple if the circumstances demand it.
Advanced Data Protection changes the equation. When you enable it, end-to-end encryption extends to almost everything in iCloud: backups, photos, notes, reminders, voice memos, and more. Apple no longer holds the keys. Only your devices can decrypt the data.
The practical effect is that your iCloud data becomes genuinely private. Even Apple can’t access it. Neither can hackers who breach Apple’s servers. Neither can government agencies serving Apple with warrants.
To enable: Settings > [your name] > iCloud > Advanced Data Protection > Turn On Advanced Data Protection.
Apple will require you to set up account recovery first, either a recovery contact or a recovery key. That’s because if you get locked out with Advanced Data Protection enabled, Apple can’t help you. There’s no fallback.
This setting isn’t for everyone. If you’re worried about losing access to your account, the standard iCloud encryption is probably fine. But if you care about privacy and you’re disciplined about account recovery, this is one of the most meaningful steps you can take.
Stolen Device Protection
Stolen Device Protection is relatively new, and it addresses a specific nightmare scenario that’s become increasingly common.
Think of a thief who watches you enter your passcode in public, such as a bar, on the subway, or concert. Then they steal your phone. With your passcode, they can change your Apple ID password, disable Find My iPhone, and lock you out of your own account. By the time you realize what’s happened, your digital life is gone.
Stolen Device Protection adds friction to this attack.
When it’s enabled, certain sensitive actions, like changing your Apple ID password, turning off Find My, or accessing saved passwords, require Face ID or Touch ID authentication. A passcode alone won’t work. And for the most critical actions, there’s also a one-hour security delay, but only when you’re away from familiar locations like your home or workplace.
The idea is that a thief can’t make irreversible changes to your account in the few minutes after stealing your phone. You have time to remotely lock or erase the device before they can do real damage.
To enable: Settings > Face ID & Passcode > Stolen Device Protection.
There are two levels: “Standard” applies the protections only when you’re away from familiar locations. “Always On” applies them everywhere. For most people, “Standard” strikes the right balance between security and convenience.
Significant Locations
This one’s less about security and more about awareness.
Your iPhone quietly tracks the places you visit most frequently. Apple calls these “Significant Locations,” and the stated purpose is to improve personalized services. Think predicting traffic, surfacing relevant photos, that sort of thing.
In practice, it means your phone maintains a detailed log of where you go and when.
Some people are fine with this. Others find it unsettling to discover that their phone has been silently building a dossier on their movements. Either way, you should probably know it’s happening.
To view or disable: Settings > Privacy & Security > Location Services > System Services > Significant Locations.
You’ll need to authenticate with Face ID or your passcode to access this menu. Once you’re in, you can see the history, like a list of cities and specific locations, with timestamps. You can clear the history, turn off the feature entirely, or leave it on if you find the personalization useful.
There’s no right answer here. It’s a personal decision based on how you weigh convenience against surveillance. But it’s a decision you should make consciously, not one that’s made for you by default.

Safety Check
Safety Check is designed for people in dangerous situations, such as domestic abuse, stalking, controlling relationships. But it’s useful for anyone who wants to quickly audit and revoke the access they’ve granted over time.
When you open Safety Check, you get two options: “Emergency Reset” and “Manage Sharing & Access.”
Emergency Reset is the nuclear option. It immediately stops sharing your location with everyone, resets privacy permissions for all apps, limits FaceTime and Messages to the device in your hand, and signs you out of iCloud on your other devices. It’s designed for someone who needs to cut ties quickly and completely.
Manage Sharing & Access is more surgical. It walks you through who has access to your location, which apps have permissions, and which devices are signed into your account. You can revoke access selectively, without blowing everything up.
To access: Settings > Privacy & Security > Safety Check.
Even if you’re not fleeing a dangerous situation, this is a useful tool. Over the years, you accumulate sharing relationships and app permissions that you forget about. Safety Check lets you see it all in one place and clean house if needed.
App Privacy Report
App Privacy Report gives you visibility into what your apps are actually doing.
Once you enable it, your iPhone tracks how often each app accesses sensitive data: your location, your camera, your microphone, your contacts, your photos. It also shows you which network domains each app contacts, revealing who they’re sending data to behind the scenes.
The results can be illuminating. Some apps access your location hundreds of times a week even when you’re not using them. Others reach out to dozens of tracking domains the moment you open them. The information is all there, you just have to look.
To enable: Settings > Privacy & Security > App Privacy Report > Turn On App Privacy Report.
Check it periodically. If an app’s behavior seems disproportionate to its function (e.g. a flashlight app hitting your location every hour or a game contacting dozens of ad networks), that’s a signal worth paying attention to.
Final Thought
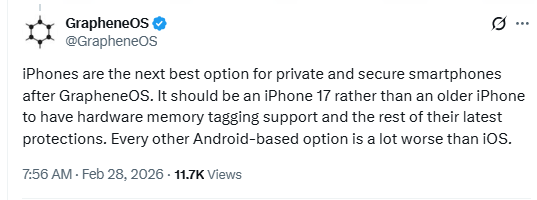
None of these settings will make your iPhone perfectly private. iOS is still a closed system controlled by Apple, and Apple’s interests don’t always align with yours. Though it’s worth noting that the GrapheneOS project recently said that an iPhone 17 is the best private phone option behind a Pixel running their OS. 👇
But these nine settings represent the controls Apple does give you. Most people never touch them. Now you know where they are and what they do.
Pick a few. Enable them. And if you found this useful, share it with someone who could use the nudge.
Two More (For Paid Subscribers)
Two more settings below, for paid subscribers only. The first addresses an attack vector that lets someone intercept your two-factor authentication codes and take over your accounts without ever touching your phone. The second stops email senders from tracking exactly when you read their messages and where you were when you did it. Both are fixable in minutes. Both are worth knowing about.
